Google Tag Manager
Lets Install TruConversion tracking code on your site using Google Tag Manger. The code is available on TruConversion app dashboard.
How to add TruConversion tracking code through Google Tag Manager:

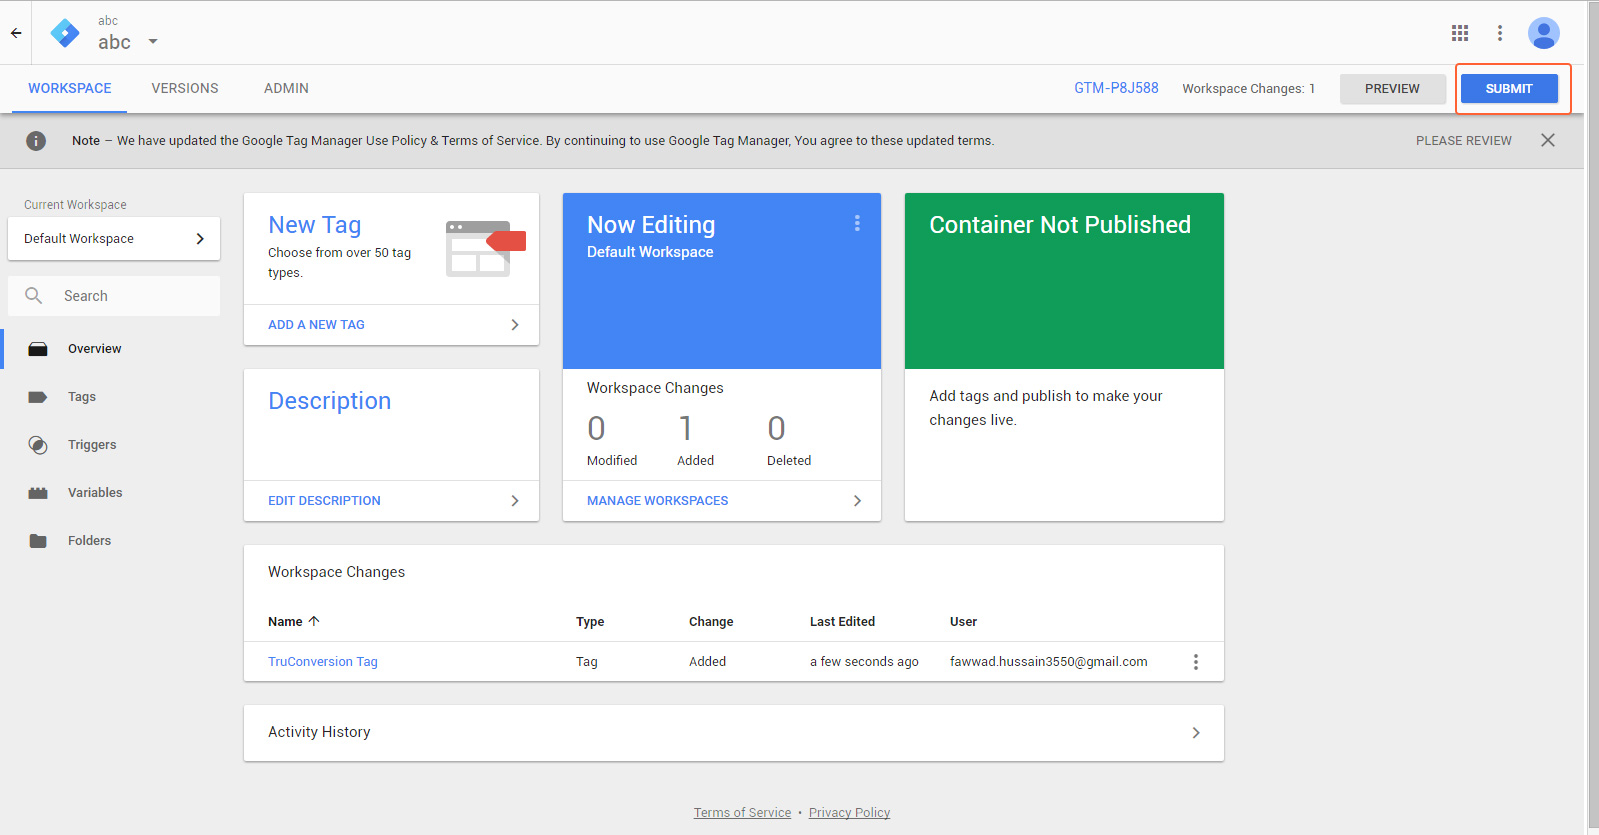
Now almost completed just click on top right button “Submit” and then publish the changes. After a few minutes, you can start to use the TruConversion tools!
How to add TruConversion tracking code through Google Tag Manager (Scree Shots):
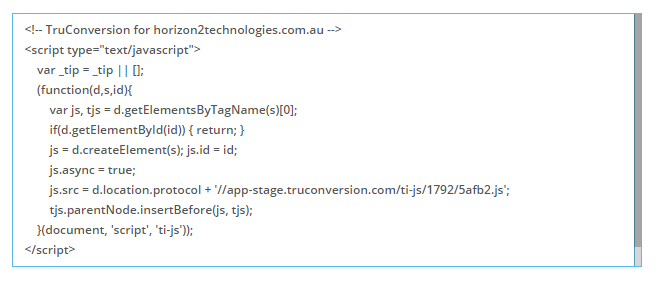
- Copy TruConversion tracking code
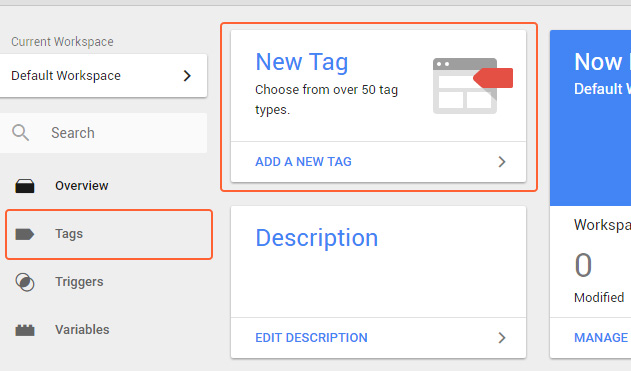
- Open Google Tag Manager, Click Tags
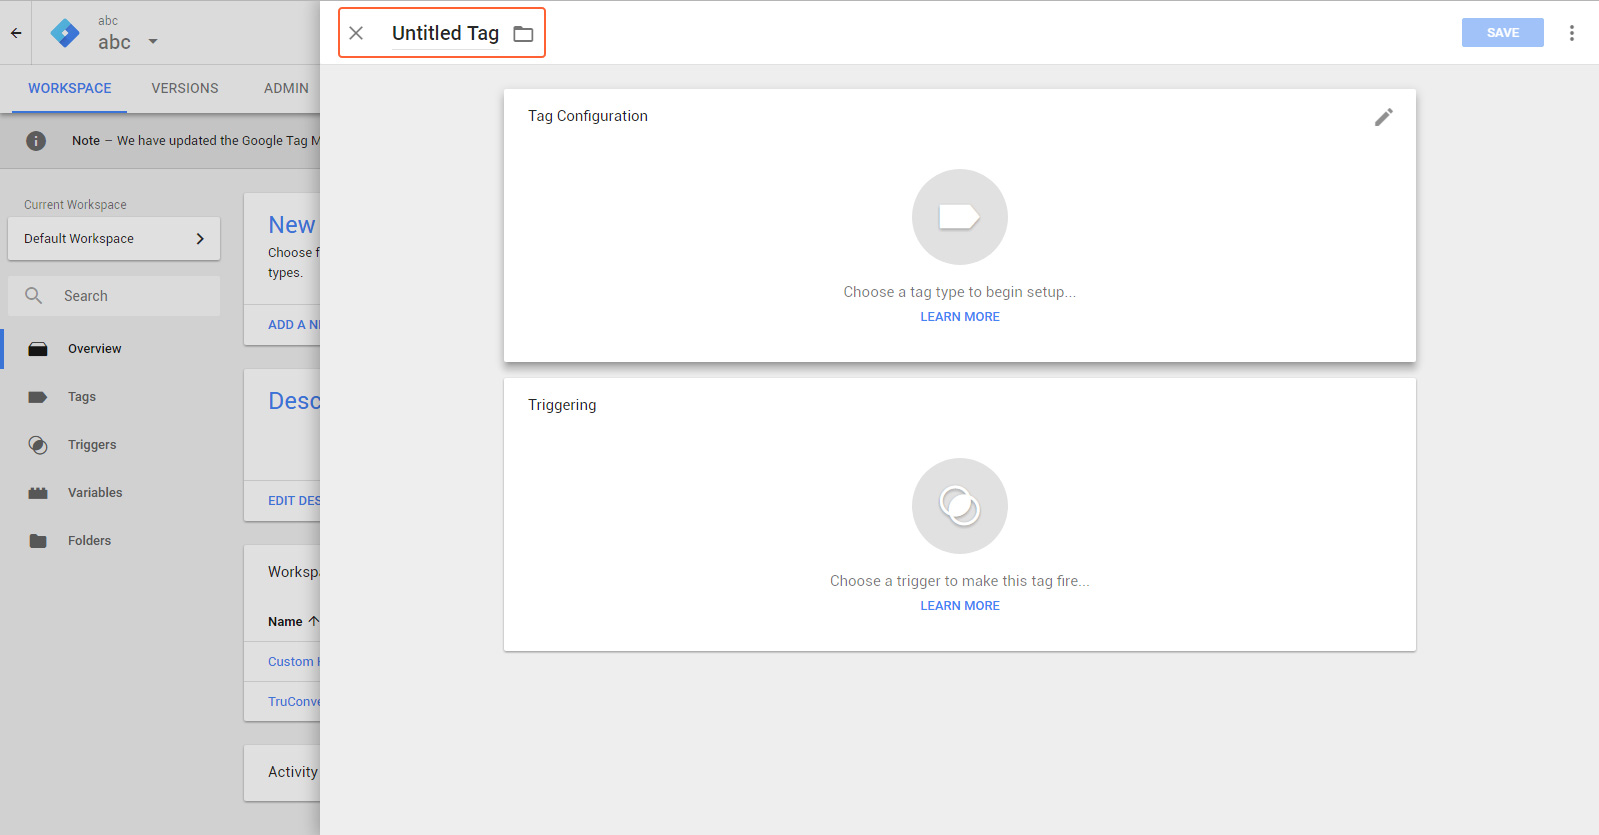
- Enter a name
- Click Tag icon to add tag
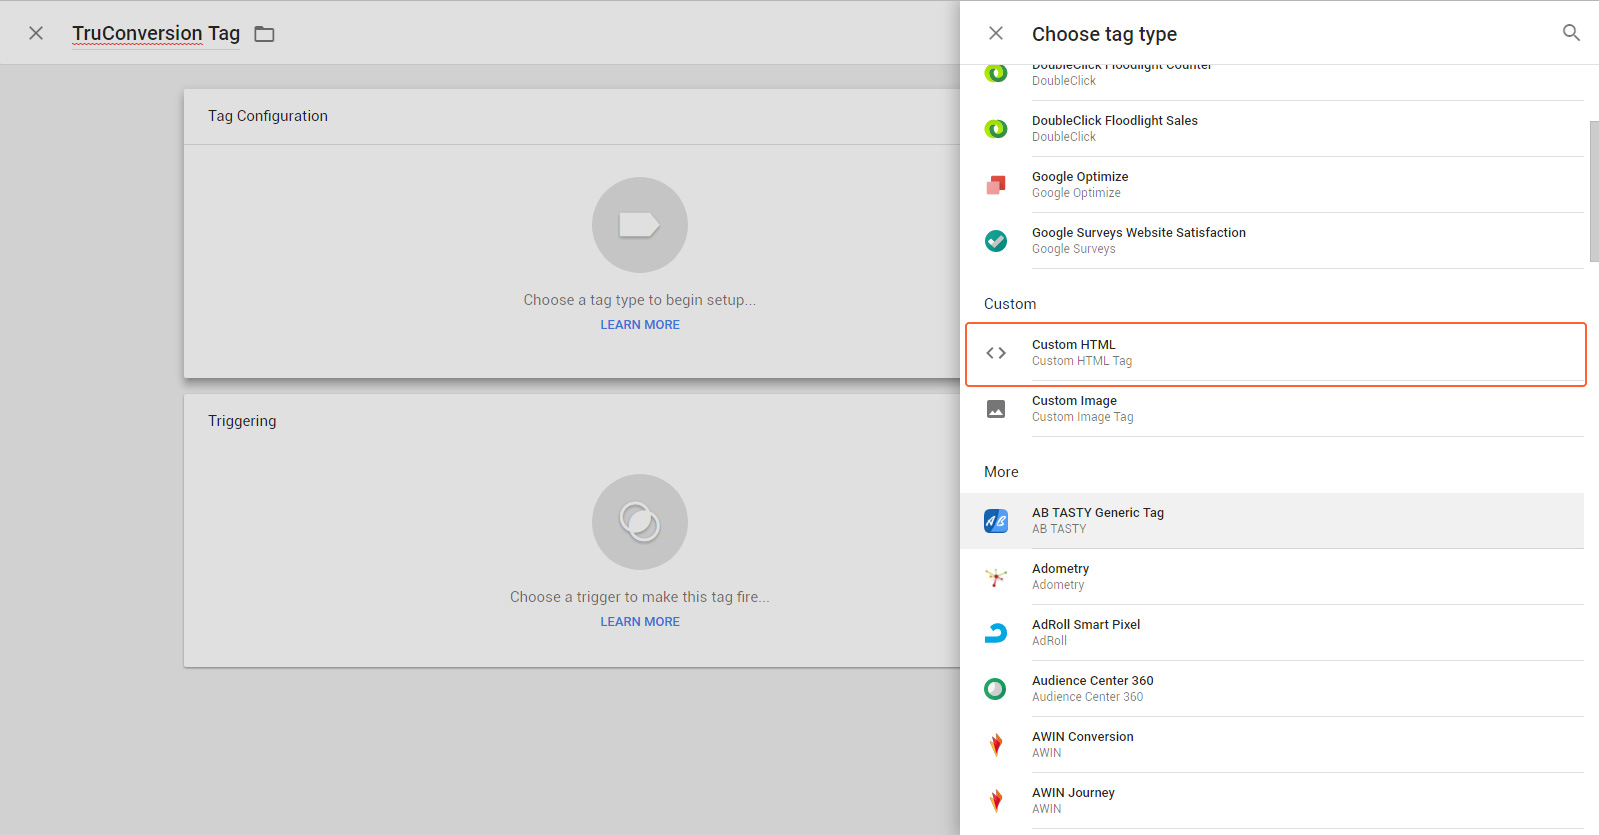
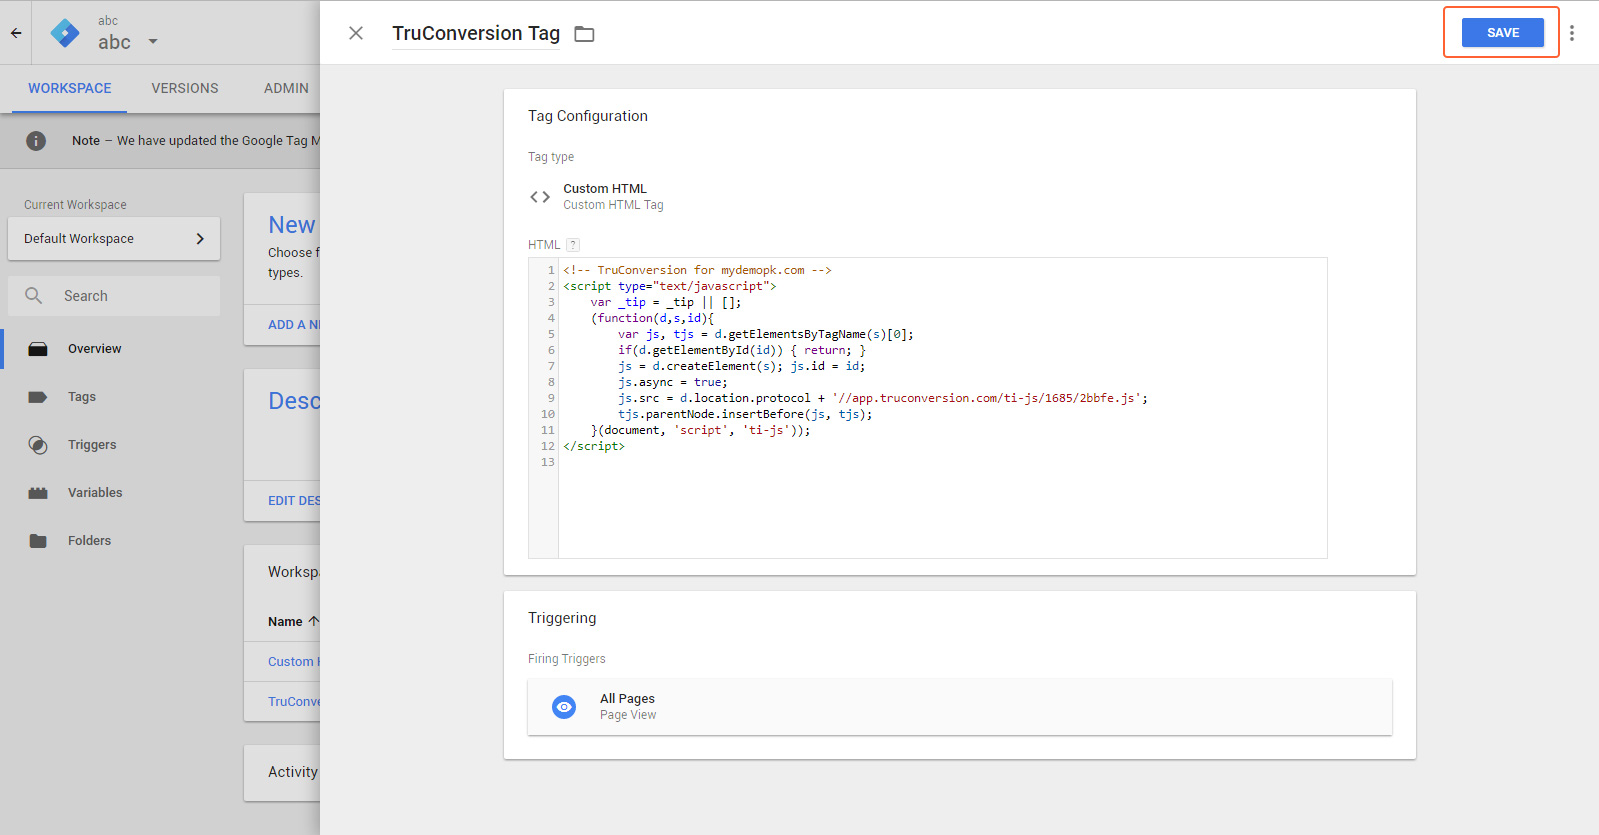
- Find and click on CUSTOM HTML TAG
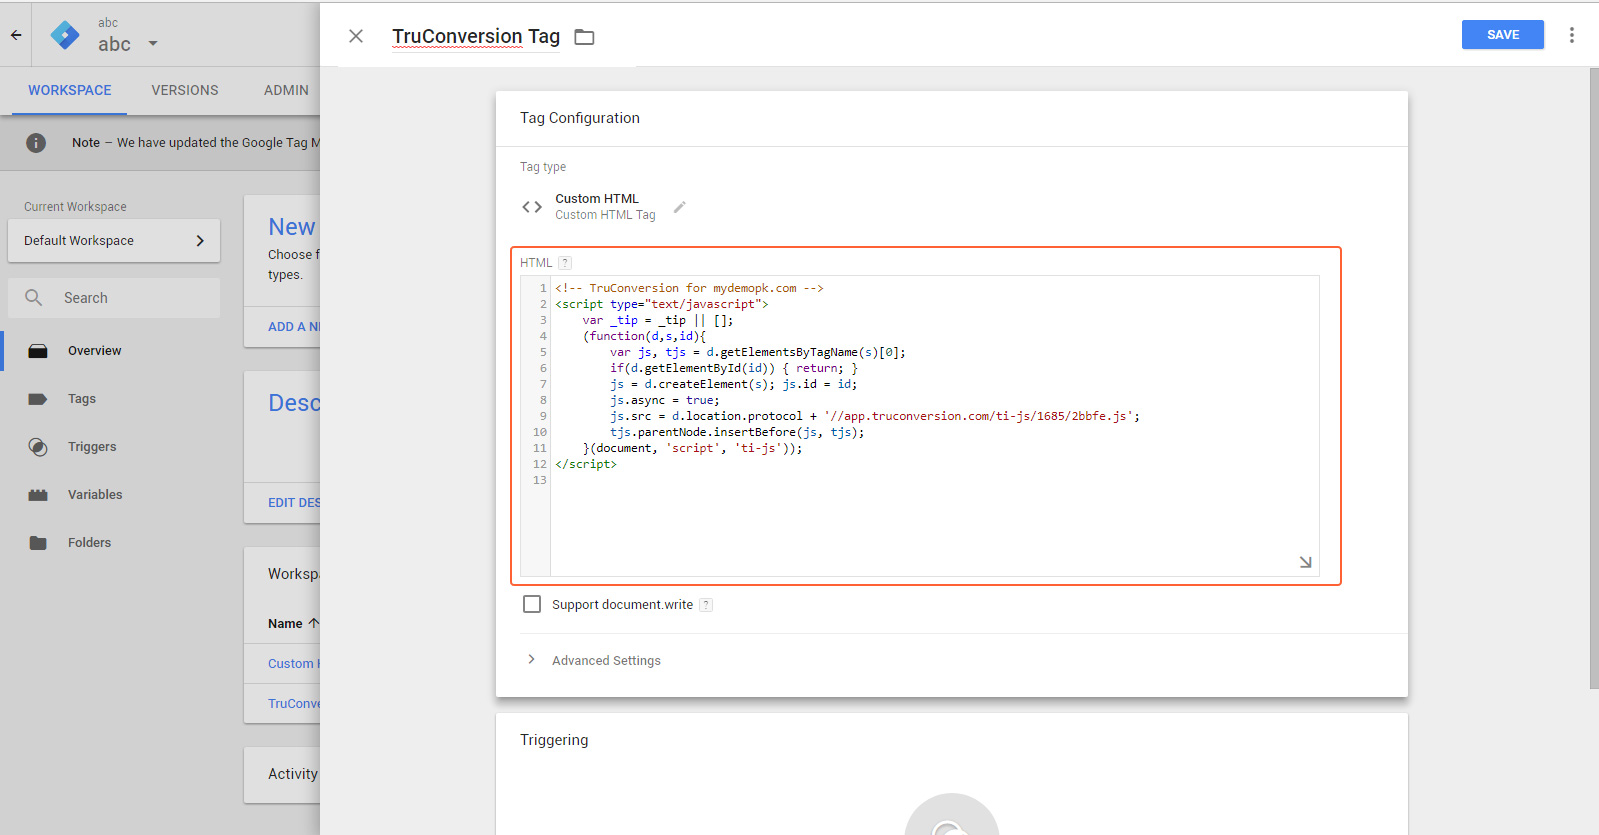
- Paste TruConversion Tracking Code in HTML area
- Click at Trigger icon from Triggring section
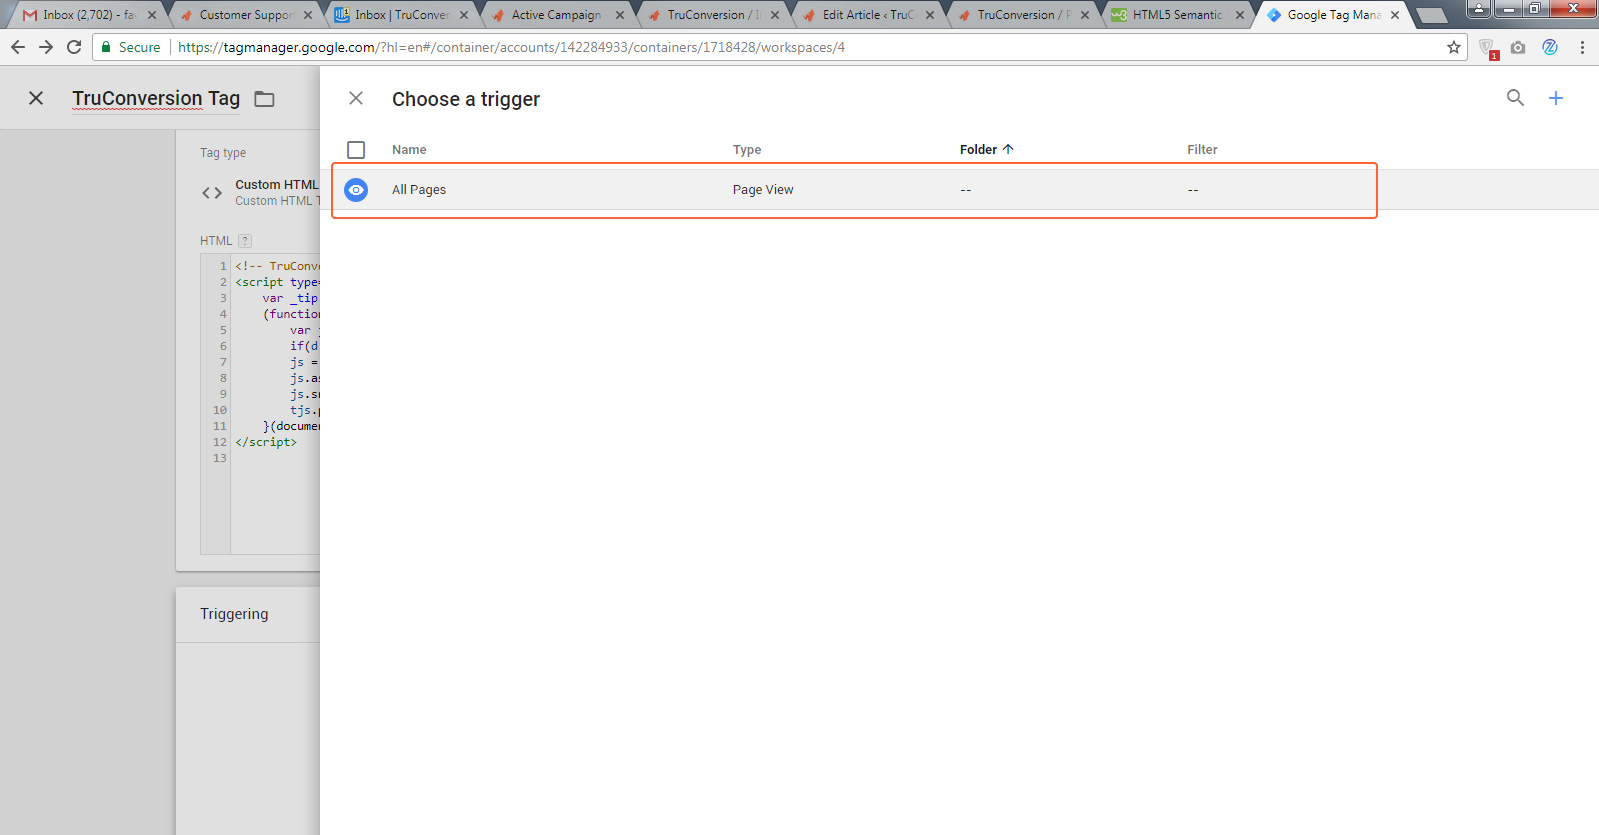
- Choose all pages
- Choose all pages
- Finally submit and then PUBLISH to make the tag live
- Verify Code Installation
Go to TruConversion app dashboard and copy the complete code.
or Select TAGS from left
Click and give your tag a name for example “TruConvesion Tag”
Click and select you tag type
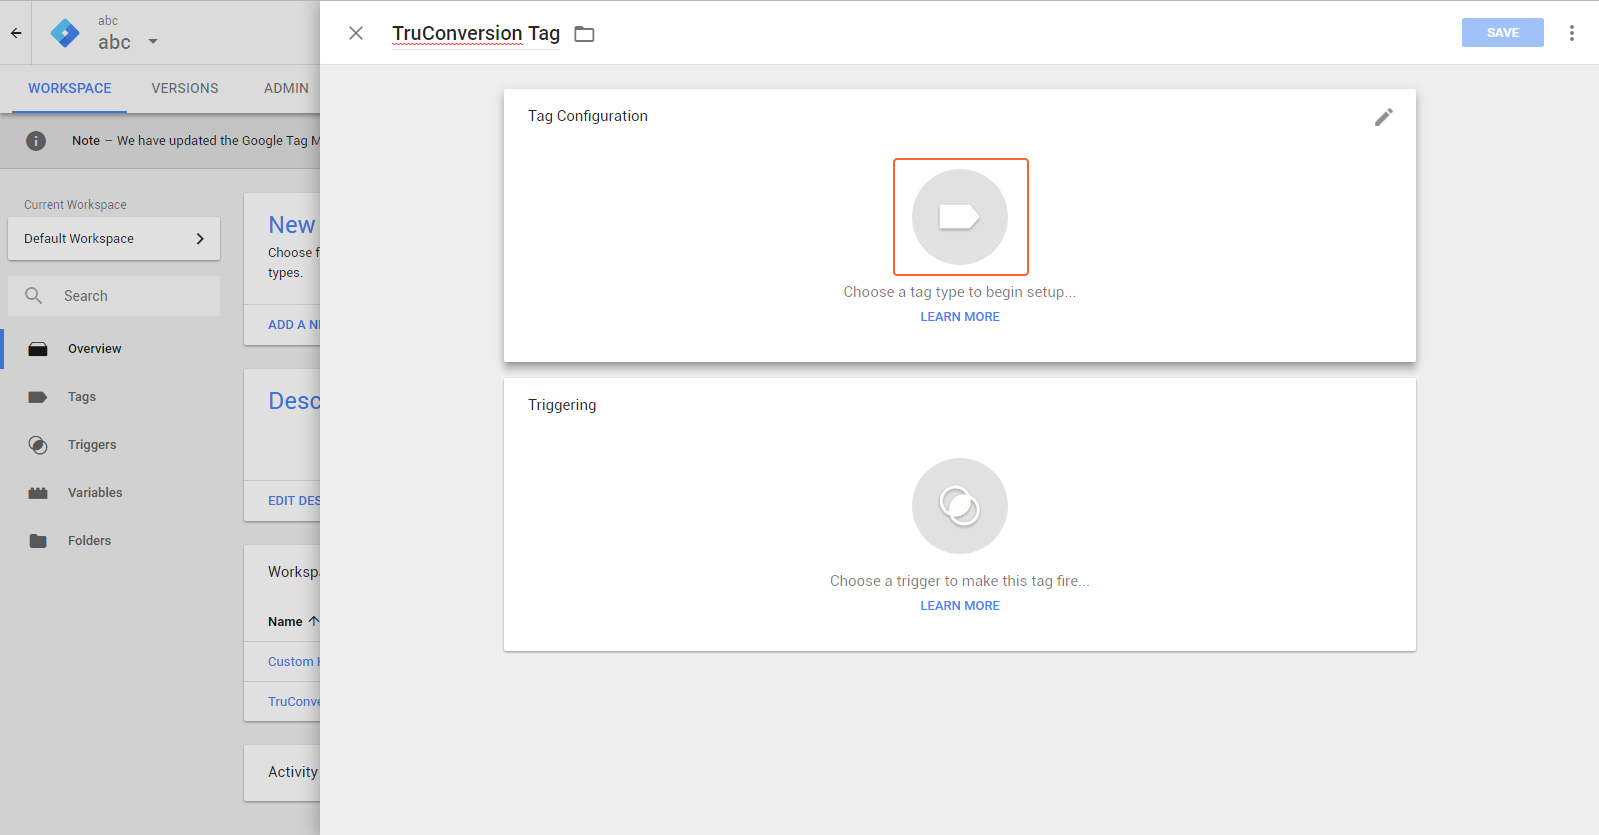
Under “choose tag type”, select CUSTOM HTML TAG
Paste TruConversion tracking code in HTML field and come down to Triggring
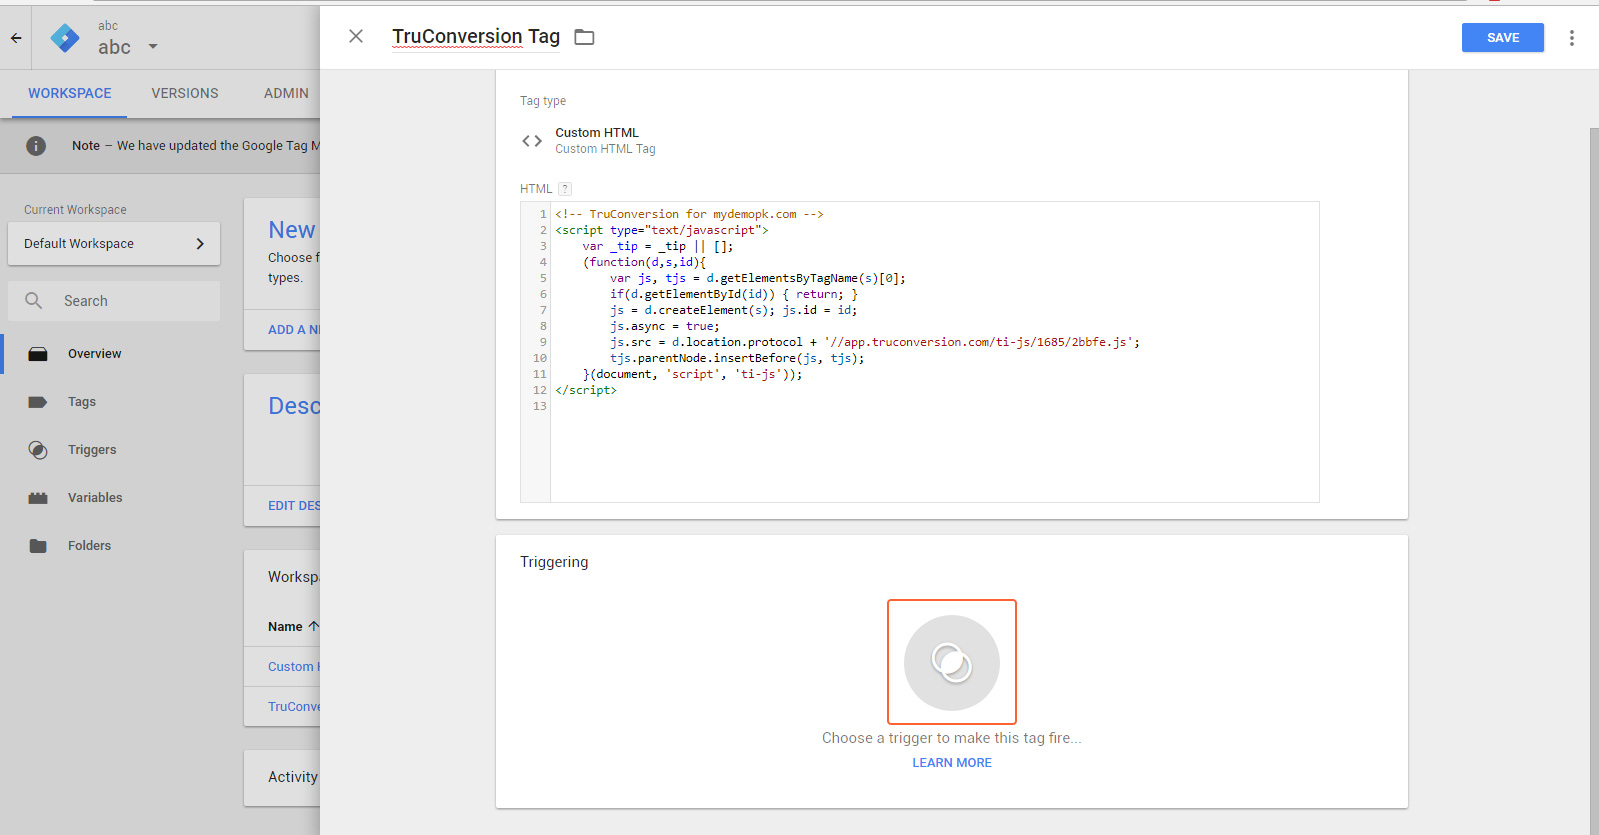
Under Triggring select ALL PAGES to make sure TruConversion code loads on all pages and click CREATE TAG
Under Triggring select ALL PAGES to make sure TruConversion code loads on all pages and click CREATE TAG
![]()
Open your site in a browser, let it fully load. Then go to TruConversion application dashboard, and click on VERIFY INSTALLATION.
That’s it. Now you can create the first campaign for your site.
NOTE:
- This tracking code will be unique for every new site you add. If you make any major changes or modifications to your website after installing the TruConversion tracking code , make sure to copy paste the tracking code again on the head tag because this code must be accessible by TruConversion server in order to track visitor activities.
- After making changes to the site, make sure that you have installed TruConversion correctly by clicking on “VERIFY INSTALLATION”.